Serial port problem part-way resolved

Having put the 4 port serial card back into boron, the onboard port now works again, so I’ll probably continue with developing the software. The expansion card still doesn’t work though, so I’ve ordered a cheap 2-port card from eBay in the hope that a different card will work.

Before reinstalling the card I upgraded Ubuntu to see if that would help (it didn’t) which brought its own scary moment of the 1TB RAID volume being dead. That too is solved now – the drive letter assignments had changed.

Hitch with the audio system

Today I started development of the software to control the whole-house audio system. It’s written in C# and based on the MiniHttpd project – a small but powerful implementation of a web server in C#.

However, when it came to testing the first bits of code, I’ve envountered a problem. A while ago I bought a 4 port RS232 serial card to go into boron, because the motherboard only has 1 onboard port which isn’t enough for the UPS, the matrix switcher and probably some other things such as connections to network switches.

The new card shows up fine in lspci, seems to be ok when running setserial -gb, but when trying to send or receive data nothing happens. Thinking it might be a conflict with the onboard port, I went into the BIOS and disabled it. Still nothing. So I swapped the card into another machine and re-enabled the onboard port in boron‘s BIOS. Now the onboard port doesn’t work either.

I’m going to contact the manufacturer of the card for some help. But for the onboard port I’m completely stumped. It too shows up in lspci and setserial -gb (though only when running using sudo, which wasn’t necessary before) but any attempts to use the port result in various I/O error messages. I was worried that the new card may have killed the serial communication capabilities of the matrix switcher and the UPS, but I’ve confirmed that at least the matrix switcher still works by connecting it to my test machine, iron.

If anyone thinks they might know what’s getting on, please get in contact via the comments for this post – I would be very greatful for any help.

Successful test of audio over CAT5

I have just successfuly tested transmission of near-line-level audio over the cat5 cables I’ve recently finished installing.

DAB Radio

The amplifiers and matrix switcher have been installed for a while, but until now I’ve not performed any tests of sending audio from one part of the house to the matrix switcher, through the appropriate amplifier and out of the installed speakers.

Green 2m CAT5 cable

I bought some 2m green cat5 cables off of ebay, but rather than use them as normally intended I cut one of them into two equal lengths.

After removing a length of the outer insulation at the cut ends, I attached 2 phono plugs to one length and a stereo 3.5mm jack to the other (with a little help from wikipedia for the correct pinout of the latter).

A multimeter was used to verify that there weren’t any shorts – wire-wrapping the connections was a little fiddly – before I plugged the cables in for testing.

Jack connected to DAB radio

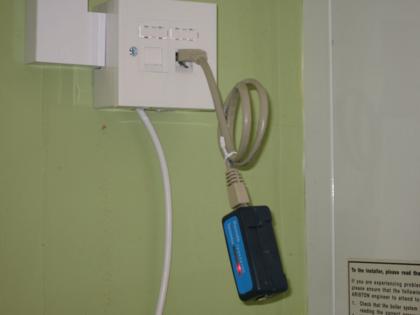
The length with the phono plugs was connected to the matrix switcher and the RJ45 patch panel, and the other length was attached to the headphone output of a DAB radio in the kitchen and one of the 2 ports in that room.

Patch panel connection

The successful test is promising for the completion of this project. I have ordered and bid on 2 more sets of speakers for the dining room and kitchen, and the final amplifier will be ordered soon.

The software needs to be written to control the system, but I could probably do most of that in a weekend. A little more hardware in the form of a touchscreen capable low-power computer and an iPod Touch will be required to run the web-based front-end for the software. Then the system should be complete.

Look out for a video demo of the system once I’m happy with it!

Completing the data wiring

img_2141.JPG

Today I added the final 4 network points – there are now a total of 24 around the house.

The wiring project started about 14 months ago, with the plan to have at least 2 network points in all rooms except the bathroom. The final distribution has ended up as:

  • Living room: 6
  • Dining room: 4
  • Kitchen: 2
  • Pantry: 4
  • Landing: 2
  • Bedroom 1: 4
  • Bedroom 3: 2

img_2130.JPG

Despite considering that 24 ports might be a little excessive, I’ve come to realise that 24 ports isn’t quite enough especially when it comes to distributing analogue audio & video over CAT5 (i.e. not as IP data) since at least one port is required for each A/V combination depending on the quality of the signal desired. The living room should probably have 4 more ports, the kitchen could do with at least 2 more and a couple by the front door would come in useful for security purposes.

img_2037.JPG

I’ve learnt a lot from the experience of doing this wiring, such as how to lift floorboards, that lathe & plaster ceilings are extremely fragile and plastering is nowhere near as easy as it looks.

img_2076.JPG

Running the cables before moving in was certainly a good idea. It would have taken me probably another 12 months otherwise to get to this stage. It’s taken a lot more work than I expected, although the overall time is down to being in a lazy, bored and/or apathetic mood most weekends. I’m glad I did it though – the ports have come in useful for the MythTV system, for the family computer and soon enough the whole-house audio system. I’m also using them to trial some IP video cameras.

img_2071.JPG

img_2134.JPG